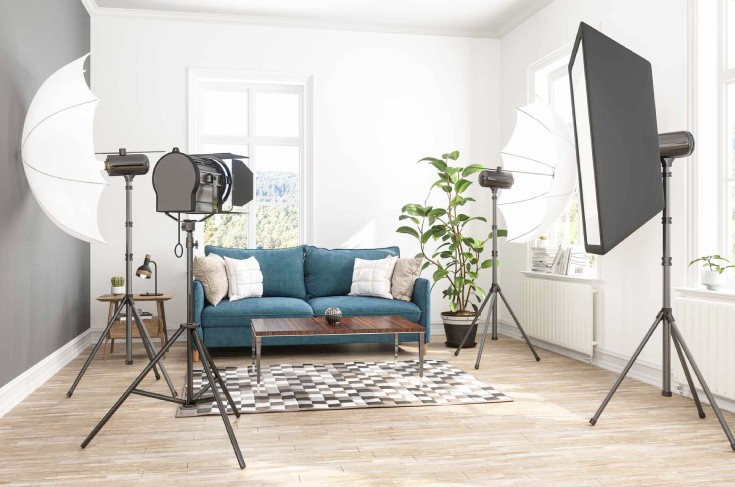
If you are passionate about photography and you love to capture special moments this article is exactly for you. Have you ever considered designing your own studio?
Well, maybe is time to stop dreaming about it and take the first steps to make your dream true.
Your home is the perfect place to set up your photography studio and invite many people for professional photo shooting.
Creating your own studio is a great way for every artist to show his work to the world and have an inspiring space that can lead his career to a new level.
There are many reasons why you have to start designing a home photography studio. The place will allow you to have complete control over the environment, lighting, and overall aesthetic, resulting in stunning images that reflect your unique style.
We want to present you with a step-by-step guide on how to create a home space that maximizes your creativity and helps you capture beautiful moments. Are you ready to explore more?
Choose the right space
It’s very important to choose a room that can hold all your equipment and also provide enough space to establish your photo-shooting decors.
This might sound like a difficult task. To make the best choice you have to evaluate all the available space and also make a plan for how to organize it.
When you assess the space at your home you have to consider very important factors such as natural light sources, ceiling height, and the overall layout of the space.
The best choice is a big empty room with enough natural light that will be easily changed to a home photography studio.
Use your creativity and think out the layout
The next very important step is to plan the layout of the studio. First, you have to do is to determine the main shooting area.
There should be enough space to arrange the furniture and the subjects that will help you to create your ideal interior. Think about what you will put on the walls. Maybe a wallpaper that matches your idea or just simple paintings – the choice is yours.
If there is enough space you can consider creating different zones. The thing you don’t have to forget is to leave space where you will store your equipment.
Set up various light sources
Every photographer searches for the best lighting which is an essential part of making good photos.
Your home photography studio should provide flexible light sources. Of course, natural light is the best source of that’s why is good to create your studio in a room with big windows.
For the times when it’s impossible to use natural light, you have to install controlled lighting conditions.
A great piece of advice is to invest in artificial lighting equipment such as strobes and soft boxes. Finding the best lighting effect might take some experiments with different lighting setups to achieve the desired mood.
Organize and get rid of the clutter
Creating a clutter-free environment is essential for your creativity flow. If you want to set up a functional home photography studio you should think about how to organize the space in the best way.
This means finding space for all the equipment you use. A great idea is to consider some storage solutions such as shelves, cabinets, or storage bins. Keep in mind to create safe storage space and ensure easy accessibility.
Consider Comfortable Seating and Viewing Area
You have to think about where you will welcome your clients and discuss the project. Consider a to leave a small space for a seating area where people can seat comfortably and enjoy the photo shoot.
Another idea is to set up a small office that can be used for client consultations, reviewing images, or conducting post-production work.
If the space allows you can also create a viewing Area and invite more people and potential clients to get to know the process of your work.
Arrange a small gallery
You can show your best photos by arranging a small gallery as a part of the decoration of the studio.
You can put the photos in a fancy frame and hang them on your studio walls for clients to enjoy your best work. Another advantage is that you will be able to be inspired by them while working on other projects.
If you like this idea think also about the proper lighting is crucial to highlight your artwork. You can install adjustable spotlights or track lighting to ensure that each photograph is well-lit and showcased effectively.
We hope after these 6 steps you feel more ready and inspired to set up your home photography studio. Follow this guideline and make sure you will have a creative hub where you will capture many smiles.

My name is Scarlett Mitchell and i am an author and editor in the home topic website – FemCasa.com.
I’m just an enthusiast who wants to share her visions, ideas and advices, when it comes to decorating every part of your home until it becomes the perfect relaxing place for you and your family.

